Shaders and filters
| Back to ↩Shaders, presets, and filters | |||
| Shaders and filters | Shader presets | Future of CRT simulation | Shaders on real CRTs |
Shaders and filters can be applied to video games to enhance visuals or achieve some kind of visual effect. These can range from attempting to replicate aperture grille displays, NTSC signals, or something more exotic.
Disclaimer
CRT
One of the most popular categories of shaders. While there have been many attempts to include some kind of CRT-esque filter in older emulators — usually involving little more than overlaying dark gray or black lines, colloquially referred to as scanlines, over the image — modern CRT shaders are much more complex and configurable.
Many of these replicate aperture grille CRTs (exemplified primarily by Sony TVs and monitors, though other manufacturers released their own versions of the technology later on), which have sharp images and strong scanlines. If you find that these shaders don't look a damn thing like your old TV, it's probably because you owned a slot-mask-style CRT, which typically had less noticeable scanlines, or simply had a smaller set, which tended to be less sharp. The easiest way to tell the difference is to feel the curve of the screen: aperture grilles only curve horizontally, if at all. Alternatively, look at the left and right sides of the glass against the frame — if the sides are curved, it's a slot mask; if they're straight, it's an aperture grille. Old TVs usually had slot masks, whereas monitors usually had shadow masks. While slot masks and shadow masks can be emulated to a certain degree even at 1080p, much higher resolutions like 4K are better suited to the task. Aperture grilles are much easier to emulate and can be satisfactorily replicated at 1080p, though it goes without saying that even better results can be achieved with higher resolution.
It is advisable to use integer scaling when using CRT shaders. This means either using windowed mode (x2, x3, x4) or setting an integer scaling option in the video options. The reason is that non-integer-scaled scanlines will result in uneven lines with artifacts, though some shaders use oversampling to try to avoid this. If the resulting letterboxing annoys you and you still want to fill up as much of your screen's real estate as possible, you can also try integer scale overscaling, which scales the image up by another integer to fill the vertical image space while still preserving integer scaling, at the expense of some of the image on the top and bottom being cut off. As an example, at 1080p, turning on overscaling would scale a typical SNES game running at 256x224 to 5x scale — i.e., 1280x1120 — cutting off twenty pixels from both the top and bottom of the image to reach 1080p. Before you fret, know that at 1080p and 4K the loss from overscaling is usually negligible and well within the area that would've been expected to be cut off on a real CRT anyway due to overscan; and developers almost always took this into account and made sure not to put any crucial game information there, so on many if not most older games, overscaling is completely safe.
-
 CRT-Geom
A versatile, configurable shader simulating an aperture grille display. -
 CRT-Caligari
Simulates curvature and scanlines using a unique blending method. -
 CRT-Easymode
Lightweight and fast with simple, beginner-friendly parameters. -
 CRT-Lottes
Simulates a horizontal slot mask pattern with bloom and scanline blending. -
 ZFast CRT
Extremely fast shader designed for very low-end hardware and handhelds. -
 GTU
GTU


Links & Resources
All official releases of RetroArch come bundled with a full set of slang and GLSL shaders, including CRT shaders, pulled from their shader repositories on Github, which are regularly maintained and updated. The simplest way to keep up to date with shader development is through RetroArch's built-in updater, though if you are only interested in the CRT shaders, you can alternatively grab them from the following repos:
Repositories
- slang shaders – For use with devices that support Vulkan, OpenGL 3.x, GLES3, and/or D3D10/11/12. This is the most current, regularly maintained repository.
- GLSL shaders – For use with devices that only support up to OpenGL 2.x or GLES2. Largely deprecated, though still sporadically maintained.
- Cg shaders – For use on platforms that only support Cg or HLSL runtimes, such as the PS3. Deprecated.
Individual CRT shaders
- CRT-Geom: slang | fast | deluxe
- CRT-Caligari: slang
- CRT-Easymode: slang | halation
- CRT-Hyllian: slang | dev thread
- CRT-Lottes: slang | fast | multipass
- Fakelottes: slang | thread
- ZFast CRT: slang
NTSC
- For encoding or formatting systems for the transmission and reception of terrestrial television signals, see Broadcast and cable communication systems#Analog television systems.
- For the NES/Famicom's unique method of generating NTSC video signals and the resulting color variation across different displays, see Famicom color palette.
- For dedicated dithering shaders, see #Dithering.
NTSC filters replicate the analog signals that the console's output to the TV. They vary in quality, with the lowest quality being RF, then composite, then s-video and RGB (SCART)/YPbPr (Component) being the highest quality. Many emulators have NTSC filters built into them. They can also be separately downloaded as filter plugins. These filters were developed by blargg[1] for specific consoles. Other NTSC shaders have been created which are different from blargg's implementation. A different approach is taken by Clock Signal, in which composite video processing is an inherent part of the rendering chain, as opposed to a post-processing effect.
Encoding luminance (or luma, the brightness component of the signal) and chrominance (or chroma, the color component of the signal) into a single signal is what causes blur and artifacts because it's a lossy way of encoding an image. RF has worse artifacts because it also encodes audio into the signal and is more prone to interference since the signal is the same as that used in TV broadcasts.
Many games were developed with the color distortion from these signals in mind, such as Chrono Trigger, with shifted values that make blacks look brown and borders look purple which would be output properly with NTSC colors, and Kirby's Dream Land 3, with vertical line patterns combined with high horizontal resolutions producing translucency effects when blended by the analog signal. Other games like Sonic used dithering patterns that would be blended on the Genesis/Mega Drive composite output, which is notably blurrier than NES or SNES composite video.
Individual NTSC filters

- RF
- The lowest quality. Very blurry due to crosstalk between video and audio signals, and subject to static due to interference.
- Composite
- Higher quality than RF, but still blurry and with lots of color artifact and usually dot crawl due to crosstalk between luma and chroma. This is what most systems used as default.
- S-video
- Much cleaner image due to luma and chroma being separate signals, though color blur still present and chroma resolution is about the same as the composite output.
- RGB
- The highest quality possible, since it uses separate channels for each color, along with a sync signal. Component YPbPr is similar, where it uses luma+sync, blue minus luma, and red minus luma for signals to give high quality, high bandwidth output capable of displaying higher resolutions, though this is only utilized by newer consoles.
- blargg's NTSC
- Powerful and optimized, but they are very system-specific. There is a version for NES, SNES, SMS, and Genesis/Mega Drive, and each is intended for that system only, expecting a certain size input resolution. Certain games on other systems than the intended one can still make use of them, but not without glitches. For instance, on certain PS1 games that have multiple resolutions, some of the resolution modes will work properly with these filters, and some won't. This may mean the aspect ratio is horribly messed up for menus, but the main gameplay will look normal. These filters upscale the image wide horizontally, but don't touch the vertical scale, so 1:1 PAR may result in weird aspect ratios. The level of blur in RF and composite signals are needed for dithering to blend on Genesis/Mega Drive. S-video and RGB are too clean to blend dithering. In some emulators, it will have sliders for settings such as Resolution (level of signal blur), Sharpness (sharpness/comb filter that some TVs used), Color Bleed, Artifacts, and Fringing. Others simply use the preset settings. Note: RF preset is just composite with field merging disabled, so it emulates the oscillating artifacts composite output has (Go here and see the 3rd image on the right for an example of this).
- Currently missing RF
-
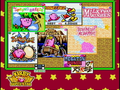 Composite
 -
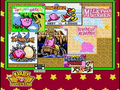 S-Video
 -
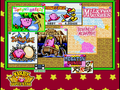 RGB
RGB


- Maister NTSC
- A set of NTSC shaders[2] created by Themaister for use with various emulator cores in RetroArch. These try to be more "generic" than Blargg's filters, so they will work with any resolution without major glitching. There are several presets that cover different methods of generating composite and S-Video signals. The 256px presets use 3-phase NTSC output, which is what the NES and SNES output. The 320px presets reflect the more common NTSC output from the Mega Drive/Genesis, PC-Engine, PlayStation, and most consumer video electronics. These presets assume 256px and 320px horizontal resolution input respectively, and scale that to 1024px and 1280px to display the NTSC effects. This may result in scaling artifacts if the game's input horizontal resolution is not the same, but the effects will remain consistent if the horizontal resolution of the game gets larger or smaller, allowing SNES hires translucency to work since it changes between 256 and 512, for example. Most Nintendo 64 games render internally at a horizontal resolution of approximately 320 pixels. While this width is technically "correct" for the console's signal timing and cable, the N64's Video Interface (VI) applies mandatory horizontal filtering and anti-aliasing before the analog signal is even generated. Accurate video plugins (such as ParaLLEl-RDP or Angrylion) emulate these hardware-level effects before the NTSC shader is applied. However, because the resulting image is notably soft, users often experiment with both 320px and 256px presets. While the 256px preset is technically "incorrect" for the N64's output, many prefer it for its thicker, more aggressive artifacts and heavier color bleed, which can more effectively mask the harsh edges of early 3D polygons. The plain presets use 3-phase NTSC filtering and don't assume a specific input resolution, and simply scale to 4× the game's width. These will work with any resolution without scaling errors, but games that change horizontal widths may have inconsistent blurring. SNES hires translucency will not work correctly with these because of this. Among the presets, there are Composite and S-Video versions. Composite has all the fringing artifacts that oscillate every other frame, resulting in a slightly flickery image, while S-Video simply has color bleed and blur. This shader lacks the sharpness filter that Blargg's NTSC filter has, so some may perceive it as blurrier, but it also lacks the ringing artifacts caused by a sharpening filter. There is limited user tweaking available besides changing gamma, since the effect is quite complex and difficult to understand. Increasing the horizontal scale of the output of the shader from 4× to 6× will decrease the intensity of the effects (which also increases sharpness). It does not have an RGB preset, though that is covered by another shader that emulates signal bandwidth
| Preset | Visual Result | Host Display Interaction |
|---|---|---|
| 320px S-Video | Clean; slight color bleed; no "rainbows" or flickering. | On 4K/1440p, artifacts are very fine, but may look "too digital" or overly sharp for some. |
| 320px Composite | Authentic "rainbow" fringing and dot crawl. | On 1080p, artifacts scale precisely for a balanced "honest" N64 image; but on 4K/1440p, these effects can appear as thin, clinical noise. |
| 256px Composite | Heavy, thick artifacts; significant signal smear. | Artifacts appear "chunkier" on 4K, filling high pixel density with organic, analog-style noise that better mimics a CRT. |
- GTU
- A CRT shader[3] (ocused on signal characteristics: blur, gamma, NTSC color levels rather than physical CRT traits) by aliaspider that has options for emulating signal bandwidth in addition to the CRT scanlines effects. In addition to luminance (Y) signal resolution settings, enabling the "composite connection" option will allow tweaking the chrominance (I and Q) signal resolutions as well while emulating color bleed from low chroma resolutions. Since the shader is multipass, the signal bandwidth emulation passes can be decoupled from the CRT scanline emulation pass and be used with other CRT shaders or by itself.
- GTUv050 (slang)
- GTUv040 (Quark)
- GTU-Famicom
- tvout-tweaks
- A shader[4] made by aliaspider, based off GTU, intended for processing emulator images for output to a CRT TV connected to PC via VGA-to-RGB adapter. This shader uses code from the GTU CRT shader to provide emulated signal bandwidth blur, as well as TV color level conversion. Works with any resolution without issues, lower signal resolutions result in a blur that blends higher input resolutions, allowing dithering to be blended and SNES hi-res translucency to work.
- GTU-Famicom
- A variant[5] of the GTU CRT shader that emulates the NTSC NES/Famicom PPU. It requires the "raw" palette option in Nestopia, Mesen and FCEUmm libretro cores, which outputs[6] chroma, level, and emphasis as red, blue, and green color channels. GTU-Famicom takes that output and processes it as an NTSC signal, which the shader decodes into RGB colors for display. The shader also emulates the full effects of RF/composite NTSC video signals, complete with artifacts, fringing, and color bleed, and optionally RF signal noise. Like with the GTU shader, the various signal resolution parameters can be tweaked so it can be made sharper, or made to have less color bleed by boosting chroma resolution. As with GTU, the GTU-Famicom shader is multipass so the Famicom NTSC emulation passes can be decoupled from the CRT scanline emulation pass and be used with other CRT shaders or by itself.
- NTSC-CRT by LMP88959 (EMMIR)
- NTSC-CRT by LMP88959 (EMMIR) is an NTSC emulator[7] which encodes RGB images and/or "raw" NES palette indices into an NTSC signal and decodes the signal in a manner similar to an analog television.
This makes it so that it can be adapted to suit almost any system including systems like the NES, PS1, N64, SEGA systems, Apple II, etc. NTSC-CRT can emulate both progressive and interlaced composite video complete with vertical sync, horizontal sync, and color burst detection, so noise in the signal can realistically effect image warping/scrolling/quality.
It accurately reproduces color artifacting, chroma bleed, phosphor trails, dot crawl, and more. NTSC-CRT has controls for noise, hue, saturation, brightness, contrast, artifact color phase, black point, and white point.
- NTSC-CRT by LMP88959 (EMMIR) is an NTSC emulator[7] which encodes RGB images and/or "raw" NES palette indices into an NTSC signal and decodes the signal in a manner similar to an analog television.
Go here to see images of example output along with some videos. See LMP88959's NTSC-CRT supported emulators.
-
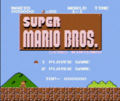 NES Decoding
 -
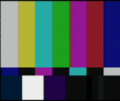 SMPTE Color bars
 -
 Apple II Frogger (Left=Input, Right=Output)


Handhelds
- For handhelds shader presets, see Shader presets.
These shaders replicate the visuals of the dot matrix and LCD displays of older handhelds, along with their specific artifacts compared to newer screens. For LCDs, these recreate the look of a low-resolution LCD common on handhelds, ranging from a simple grid drawn around the pixels to a detailed recreation of each pixel's RGB subpixels with pixel transparency simulation. They may also include motion blurring to simulate ghosting and washed-out color gamuts. One example is the Game Boy Shader by Harlequin, designed to reproduce the ghosting effects some games used for transparency or motion blending; it requires RetroArch for proper emulation and shader compatibility.
Examples
-
 Dot Matrix
Simulates the dot matrix pattern of early handhelds. -
 LCD Shader
Recreates the look of low-resolution LCD screens and RGB subpixels. -
 LCD 3×
Scales the LCD simulation by 3×, emphasizing grid and ghosting. -
 LCD Grid (cgwg)
Emulates GBA-style LCDs with a realistic grid and soft blending. -
 Game Boy Shader
Simulates the original Game Boy's ghosting and color palette.


Smoothing
These shaders — such as 2xSaI, Super Eagle, Super 2xSaI, Scale2x, HQx, xBR, and xBRZ — attempt to reduce pixelation by smoothing and rounding. They can cause a lot of false positives and distortions; however, scaling the image 2× or 3× using nearest neighbor and then applying the smoothing shader will reduce the intensity of the smoothing by keeping the pixel shapes intact, eliminating most distortions while preserving a fairly smooth look. Used mostly for FMV sequences from CD-era consoles, or anime.
🔗 Anime4K Project on GitHub
🔗 Real-ESRGAN Project on GitHub
Lanczos
Lanczos shaders perform high-quality resampling using sinc-based filters. Different versions offer varying degrees of sharpness and ringing reduction.


Bicubic
Enlarges images by calculating the colour values of new pixels based on a weighted average of neighbouring pixels in the original image. Popular for its ability to produce smooth, high-quality results when resizing images, especially when significant upscaling is required.
| Name | Description | GitHub Link |
|---|---|---|
| Bicubic Fast | Optimized for performance with minimal smoothing. | bicubic-fast.cg |
| Bicubic Normal | Balanced version offering good sharpness and speed. | bicubic-normal.cg |
| Bicubic Sharp | Provides crisper edges, suitable for detailed art. | bicubic-sharp.cg |
| Bicubic Sharper | Maximum sharpness with slight risk of haloing. | bicubic-sharper.cg |
DDT (Data-Dependent Triangulation)
DDT shaders look at the square plane formed by the four nearest neighbours (a basic image resizing technique that assigns each pixel in the resized image the colour value of the nearest pixel in the original image). They divide the square plane into two triangular planes, and the pixels are bilinearly interpolated using only the three points of the triangle to which they belong.
-
 DDT
DDT
Standard DDT shader for sharp, distinct pixel edges. -
 DDT Extended
Enhanced version of the DDT algorithm with improved scaling. -
 DDT Waterpaint
A stylistic variant that creates a soft, painted aesthetic.


HQx
HQx ("hq" stands for "high quality" and "x" for magnification) is a pixel art scaling algorithm developed by Maxim Stepin and used in emulators such as Nestopia, bsnes, ZSNES, Snes9x, FCE Ultra, and many more. There are three HQx filters: hq2x, hq3x, and hq4x, which scale by a factor of 2, 3, and 4 respectively.
-
 hq2x
hq2x
High Quality 2× scaling. Smooths edges while preserving detail. -
hq3x
High Quality 3× scaling. Ideal for 480p/720p output. -
 hq4x
hq4x
High Quality 4× scaling. Maximum smoothing for high-resolution displays.


Eagle/Super Eagle
Eagle and Super Eagle shaders enhance diagonal lines and soften blockiness in pixel art. They are often used for older 16-bit and 32-bit titles to produce a smoother, more natural appearance.
-
 Super Eagle
A variation of the Eagle engine that blends pixels for a smoother, less "blocky" look.

Smoothing Shaders vs. Texture Scaling
- Main article: Texture filtering#Texture Scaling Algorithms
While both techniques use similar algorithms (like xBRZ or HQx), they are applied at different stages of the rendering pipeline. Smoothing shaders act as a "final coat of paint" over the entire screen, whereas texture scaling/filtering focuses on the individual "stickers" wrapped around 3D objects.
- Smoothing shaders are often used to hide the limitations of low-resolution 2D art by interpolating pixels across the entire display.
- Texture scaling algorithms (like xBRZ in PPSSPP) specifically upscale the source texture files, allowing the 3D engine to render them at much higher detail without the "oil painting" artifacts that can occur when the entire screen is blurred/smoothed.
| Feature | Smoothing Shaders (Full-Screen) | Texture Scaling |
|---|---|---|
| Application Point | Applied to the final output frame (post-processing). | Applied to individual 2D images before they are mapped onto 3D models. |
| Primary Target | 2D sprites, UI/menus, and FMV (full-motion video) sequences. | 3D environments, character skins, and world geometry. |
| Common Algorithms | xBR, xBRZ, Eagle, Lanczos, Anime4K, Super 2xSaI. | Bilinear, xBRZ, NNEDI3. |
| Visual Impact | Smooths out the "blocky" look of the entire game; can sometimes cause "wavy" text or melted details. | Increases the clarity of surfaces in a 3D space; prevents textures from looking pixelated when viewed up close. |
| Hardware Context | Most effective for 2D consoles (NES, SNES, Genesis) or CD-era video files. | Essential for 3D consoles (N64, PS1, GameCube) to improve visual fidelity at high resolutions. |
Anti-aliasing
A graphics rendering technique used to reduce or eliminate jagged or stepped edges (aliasing artefacts). It works by applying various methods such as super-sampling, multi-sampling, or post-processing filters to improve the smoothness and visual quality of the image, particularly when displaying diagonal lines, curves, or fine details.
-
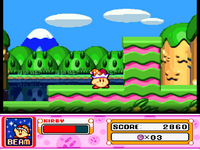 Advanced AA
High-quality shader-based anti-aliasing designed to reduce pixel shimmer and stair-stepping. -
 FXAA
FXAA
Fast Approximate Anti-Aliasing — a lightweight filter that smooths edges with minimal blur. -
 FXAA Edge Detect
Highlights and smooths edges more aggressively, useful for high-contrast visuals. -
 Reverse AA
Applies anti-aliasing in a reverse pass to reduce over-blurring.


Border
A shader that applies a border overlay to the game image. Can be used to fill empty areas on widescreen monitors with artwork, display a CRT or handheld bezel, or simulate Game Boy Player and Super Game Boy output.
Color & Luminance Processing
Image Adjustment
Image adjustment shaders allow you to adjust the color levels of an image, including gamma, luminance, contrast, saturation, and so on, for personal preference, accuracy, or compensating for your display. Often, these are used alongside other shaders. There are also shaders that simulate the color profiles of specific displays, such as the GBA or DS.
Tonemapping
- Main article: High dynamic range#Inverse tone mapping
A tone mapping shader allows you to use an external LUT texture to do tone mapping and other color adjustments.[8] The LUT texture is a PNG image that can be edited in any image editing software to have the desired color adjustment. When the modified LUT is used in the shader, the color adjustment gets applied to the game's video output.
Signal Reconstruction
Dithering
- Main article: Dithering
A technique used to increase the amount of colour and shading that can be produced on a system. The effect is achieved by using lines or dots, which are then blurred by the low-quality NTSC signals (composite or RF) used by the system. For fixing the dithering problem of fifth-generation console systems on non-CRT displays, there are some attempted shader-based solutions; however, an emulator's built-in "removing the dithering entirely" method provides better image quality. (Applying an extreme amount of blur via signal shaders can partially mask it, but this significantly degrades image quality; it also isn't accurate and is not recommended.)
Deinterlacing
- Main article: Deinterlacing
Deinterlacing methods are used to process interlaced video signals (480i/576i), common in high-resolution modes for Sega Saturn, PlayStation, and PlayStation 2. Without deinterlacing, movement causes "combing" or "judder" artifacts on progressive displays. While there are some attempted shader-based solutions, an emulator's built-in deinterlacing methods provide better image quality.
Framebuffer and Output Scaling Shaders
- For framebuffer and output resizing methods, see Scaling.
- For the practice of cropping the edges of an image to fit a display, see Overscan.
These shaders handle the final stage of the image pipeline: mapping the game's rendered frame to your physical monitor resolution. They are primarily used to ensure "pixel-perfect" clarity and correct aspect ratios without the blur or uneven "shimmering" caused by standard hardware stretching.
Mathematical Interpolation
These shaders use complex algorithms to calculate pixel values when an image is stretched to a higher resolution.
Spline36: A high-order mathematical interpolation method used primarily in video playback (like mpv) and advanced shader packs. By analyzing a larger 6×6 grid of pixels rather than just immediate neighbors, it delivers a significantly sharper image than standard Bilinear scaling while remaining computationally efficient on modern hardware. However, it is rarely a built-in emulator option[1], typically requiring users to manually load a specific `.slang` or `.glsl` file, and it can occasionally produce subtle "ringing" artifacts (faint halos around high-contrast edges).
FSR-EASU: Part of AMD's FidelityFX suite, Edge-Adaptive Spatial Upsampling is a high-performance spatial upscaler that uses gradient analysis to detect and preserve sharp edges. It is highly effective at non-integer scales (such as fitting a 1080p image to a 1440p or 4K monitor) and is widely supported in modern shader presets. This sharpness comes at the cost of higher GPU overhead compared to simpler mathematical shaders, and it can occasionally introduce a "painterly" look on high-contrast edges unless paired with a secondary "RCAS" sharpening pass. See the #Enhancements section on each emulator page for "Post-rendering scaling" support details.
Integer-Mimic & Sharpness
These shaders aim to provide the razor-sharp look of nearest-neighbor scaling while using clever interpolation tricks to eliminate "pixel wobble" or shimmering at non-integer resolutions.
| Shader | Methodology & Visual Characteristics | Source |
|---|---|---|
| Pixellate | Recalculates pixel coordinates to ensure each source pixel appears at perfectly uniform size. It is ideal for users who want a sharp look without worrying about whether their window size is a perfect multiple of the original resolution. | Slang |
| Sharp-Bilinear | Performs an integer pre-scale to the highest possible multiple below the target resolution before applying a final bilinear stretch. This custom logic preserves crispness, resulting in a much sharper image than standard hardware bilinear filtering. | Slang |
| Sharp-Shimmerless | A modern, highly optimized evolution often used on handheld devices. It treats pixels as dimensional areas rather than points, ensuring that the thickness of pixel lines never fluctuates or "shimmers" during screen scrolling. | Slang |
| Bandlimit-Pixel | The most advanced artifact-free scaler available. It uses signal-processing math (band-limiting) to remove the high-frequency noise that causes shimmering, offering superior sub-pixel movement handling. It demands slightly more GPU power and may look "too smooth" to purists who prefer harsh pixel edges. | Slang |
- Note: For the best results with these shaders, ensure your emulator's native Bilinear Filtering setting is Disabled. This ensures the shader receives raw, sharp pixels to calculate edges correctly.
-
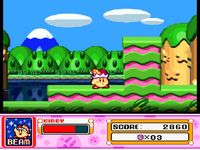 Pixellate shader rendering sample

Viewport & Pre-Processor
Auto-box shaders define how the image is positioned and constrained within the viewport (the black space of your monitor). These are essential as "pre-processor" shaders to ensure that subsequent effects (like CRT scanlines) are applied to a clean, correctly sized canvas.
-
 Box Max
Maximizes the image size while preserving aspect ratio and maintaining clean edges. -
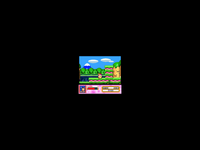 Sharpen Lighter Box
Adds subtle sharpening to the scaled image while maintaining smooth gradients and soft lighting.


Notable ReShade shaders
These are not shader presets, but you can create your own custom preset using these .fx shaders for emulation. As some of the effects (RTGI, Motion Estimation, etc.) require depth access, make sure to have your  depth buffer correctly configured if you want to use them. See this thread for using ReShade and depth buffer access for emulators.
- Pascal Gilcher's RTGI shader ($): Developed by Pascal "Marty McFly" Gilcher, RTGI & Screen-Space Ray Traced Global Illumination is a shader for ReShade that makes use of path tracing to bring real-time global illumination to every game. Global illumination is certainly not something new for games, but unlike conventional baked/precomputed real-time GI, Marty McFly's path-traced solution can provide a much more realistic and physically correct global illumination for every game. Ray Tracing Revolution's video about RTGI
- qUINT ReGrade ($): Many shaders for ReShade are designed to apply specific color adjustments, similarly to industry-standard software like Adobe Lightroom or DaVinci Resolve. A common approach in ReShade presets is to use many of these color adjustments at once to achieve their look. LUTs (look-up tables) are a cheap and simple way of changing the colours of your game without having to rely on a huge stack of shaders that eats at your performance. You can use them to make in-game colours look more natural (colour correction), or to give your game a certain stylised look (colour grading).
- qUINT Solaris ($): Solaris is a physically based exposure and bloom solution. Together with ReGrade, they replicate the journey of light into the camera, onto the sensor, and through the editing software. It uses various tricks to generate a physically plausible glow effect around bright light sources with very little performance overhead. It also supports masking objects by depth for better scene integration and to make it look natural. For best results, only use Solaris to adjust the scene brightness so that ReGrade receives a well-balanced image to work with.
- qUINT Physical DOF ($): Games use a pinhole lens camera model to render their images. As such, they do not exhibit the same visual effects seen in real cameras, and effects exclusive to those have to be artificially reintroduced. A Depth of Field (or DOF) filter simulates the blurring of out-of-focus areas in the image. In a real camera, many factors influence the appearance of the DOF blur, or so-called "Bokeh," which photographers and filmmakers use extensively as an artistic tool. This Physical Depth of Field shader recreates this effect as faithfully as possible.
- qUINT Clarity ($): Effects like unsharp mask are designed to sharpen or soften the image in a wider range, to enhance medium-sized details and give the content some grip. The balanced yet contrasty look of movie posters and magazine covers is quite often partially achieved through this effect. Much research is going into the type of filters that enhance local contrast, from the most basic unsharp mask to state-of-the-art "Local Laplacian" filtering. Using this effect in real time on video games allows you to give blurry textures some bite, enhance the overall contrast of a scene, or produce a pseudo Depth of Field effect to give the scene some depth. Clarity contains 2 different types of image enhancement, which can be used together.
- qUINT Optical Flow: Optical Flow for games in real time. The nature of optical flow is to detect and compare changes between frames over time, and then it gives us the motion vector in pixel color, like a flow map or normal map.
- qUINT Motion Estimation: Motion estimation for games in real time. Useful for injecting TAA and per-object motion blur into games (demonstration). Also see this ReShade forum thread.
- lordbean HQAA: Post-rendering anti-aliasing.
- matsilagi's RSRetroArch: Repository of RetroArch and retro-related shaders, ported for ReShade.
- MajorPainTheCactus's Sony Megatron ReShade: Sony Megatron shader ported from RetroArch to ReShade. ReShade forum thread.
- AutoHDR: This add-on is ideally intended to be used with the Sony Megatron ReShade Port presets. See the Future_of_CRT_simulation#Display Hardware Requirements section for more information.
- DevilSingh's CRT-Guest-Advanced, HD and NTSC for ReShade: This is a port of the CRT-Guest-Advanced, HD, and NTSC shaders from RetroArch/libretro to ReShade.
- CRT-NewPixie-Albatross.
- akgunter's crt-royale-reshade: This is a port of the crt-royale shader by TroggleMonkey from RetroArch/libretro to ReShade 4.9+.
- PPFX Bloom: A post-processing bloom shader that operates in an HDR-like intermediate space and applies configurable tonemapping to control highlight rolloff after bloom.
- BloomingHDR: A good alternative; works almost the same with little to no setup and is up to date with the latest ReShade.
References
- ↑ http://slack.net/~ant/libs/ntsc.html
- ↑ https://github.com/libretro/common-shaders/tree/master/ntsc
- ↑ https://github.com/libretro/common-shaders/tree/master/crt/shaders/gtu-v050
- ↑ https://github.com/libretro/common-shaders/blob/master/crt/shaders/tvout-tweaks.cg
- ↑ https://github.com/libretro/common-shaders/tree/master/crt/shaders/GTU-famicom
- ↑ https://github.com/rdanbrook/nestopia/commit/9d58851a22eb3baeee7b4fe28ae8ffaac7eaa599
- ↑ https://github.com/LMP88959/NTSC-CRT
- ↑ http://filthypants.blogspot.com/2017/06/retroarch-tone-mapping-lut-shader.html